Write an Image to a SDCARD using Windows
Introduction
Many releases for the i.MX platform which can be obtained from our release server are bootable SD-Card images.
This guide describes the process of writing these images to a SD-Card on a Windows PC (under Linux you would use the dd command).
Preparations
- Download the SD-Card image from our server.
- The downloaded file is usually in the bzip2 file format and needs to be uncompressed. 7Zip can be used if no suitable application is installed on your computer
- You should end up with a much bigger *.bin file afterwards.
- Make sure that your target SD-Card is big enough to contain this file
- Download and unzip Image Writer for Windows (0.6 is used here)
Create SD-Card
- Insert the SD-Card into your computer and check which drive letter it got assigned
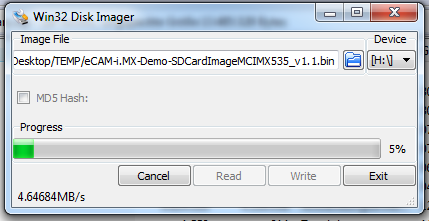
- Open Win32DiskImager.exe
- Click the FileOpen Icon and select the unzipped .bin file
- Select the letter of your SD-Card in the device drop-down menu
- Double check if you have chosen the right drive! You may damage your PC or data otherwise.
- Press write to start writing the image to the card. (This may take a couple of minutes)
- After the Program is finished, you can eject your SD-Card.
- Insert it into your target device, which should be able to boot from it when selecting the "Boot From SD-Card" boot mode
