Quick Installation Guide (DEV-BF548DA-Lite)
Quick Installation Guide
In order to set up and test your DEV-BF548DA-Lite board do the following steps:
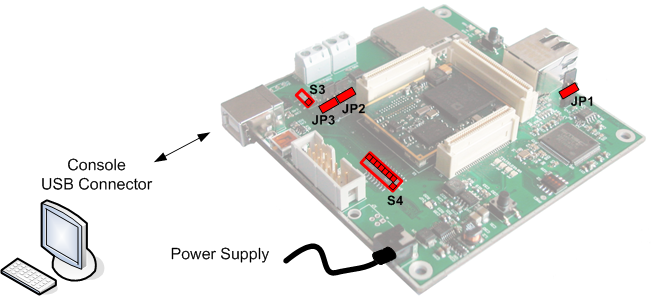
1. Insert the Core Module and make sure Jumpers JP2 and JP3 are set and the Switch S3 is in Position 1 as shown in the figure below (JP1 und JP4 unset).
2. Check the correct settings of S4: 1000 1100 and S2: 0110
3. Connect the DEV-BF548DA-Lite board via USB (X11) to the PC and open a terminal program (To set up the USB-UART driver see USB-UART driver installation guide).
4. Connect the power supply to the power connector X5 off the DEV-BF548DA-Lite board.
The pre-flashed BLACKSheep starts and the LED mounted on the DEV board starts blinking.
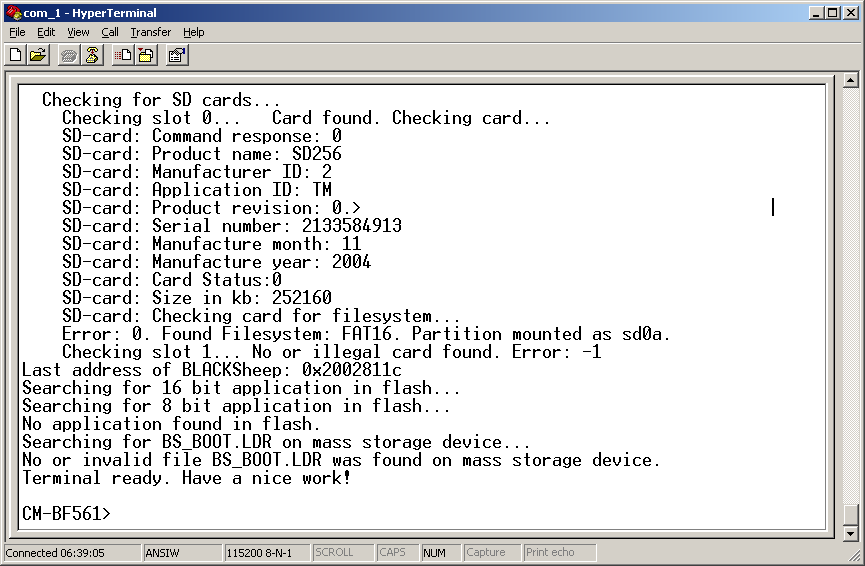
5. Press the reset button (S1) on the DEV-BF548DA-Lite Board. After this you will see the BLACKSheep boot-screen showing up. If you disconnect from the device, you have to reconnect in your terminal program.
This shows a sample boot screen. Depending on the current software version, you might get different boot messages.
To set up the Debug Agent driver see Debug Agent installation guide

